
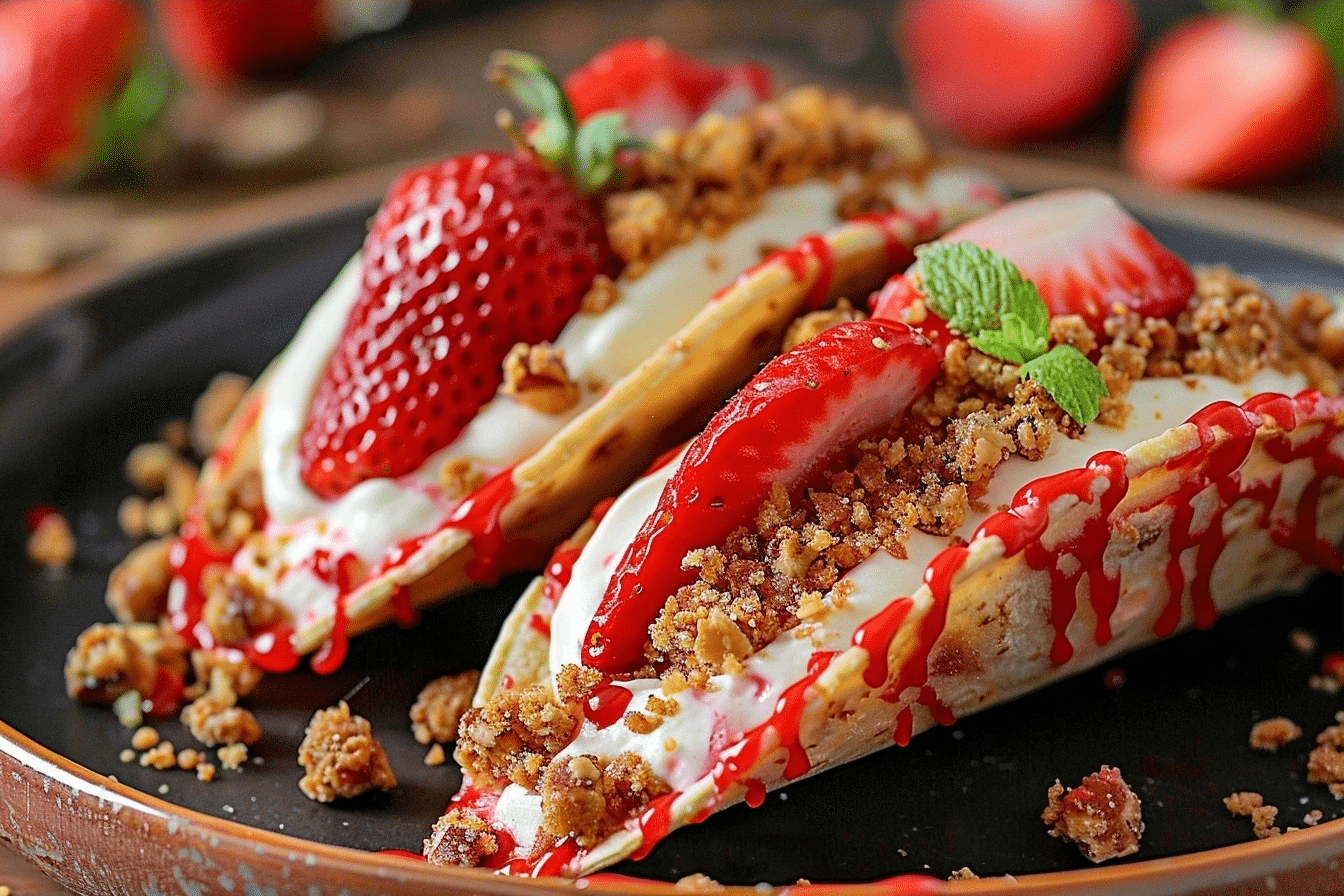
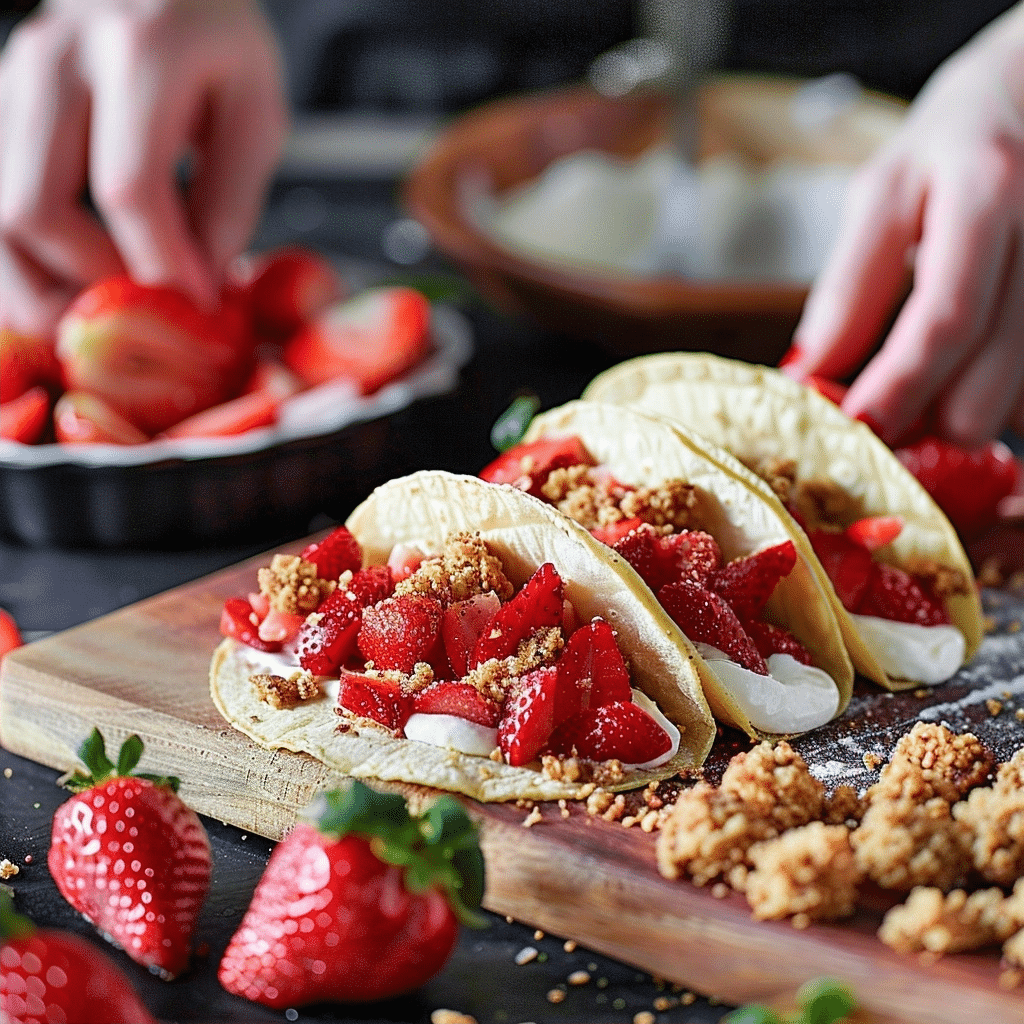
Strawberry Crunch Cheesecake Tacos are handheld dessert tacos featuring crisp flour tortilla shells coated in white chocolate, filled with silky cheesecake cream and finished with bright strawberry crunch and syrup. This dessert balances crunchy texture, creamy filling, and fresh fruit for a memorable, easy-to-assemble treat that stands up at parties and family dinners alike.
| Prep Time | Cook Time | Total Time | Servings | Difficulty | Cuisine |
|---|---|---|---|---|---|
| 25 minutes | 15 minutes | 40 minutes | 15 taco shells (makes 15 tacos) | Medium | American – Dessert |
Why This Strawberry Crunch Cheesecake Tacos Recipe Works
This recipe works because it pairs a sturdy, crisp shell with a light, stable cheesecake filling that holds its shape when piped. The white chocolate coating seals the flour tortilla, creating a barrier that keeps the shells crisp and prevents sogginess from the cream filling.
I rely on tested techniques when I bake these tacos: shaping warm tortillas over an inverted muffin tin, tempering white chocolate gently, and whipping cream to stiff peaks to ensure structure. These steps yield reliable results every time and keep the dessert simple to assemble for gatherings.
Image alt suggestion: Close-up of a white chocolate-coated taco shell held in hand to show gloss and texture.
Ingredients for Strawberry Crunch Cheesecake Tacos
This ingredients list answers what you need to make the tacos and the crunch topping. The pantry and refrigerator items are straightforward and easy to modify with common substitutions.
| Ingredient | Quantity | Notes/Alternatives |
|---|---|---|
| Large flour tortillas | 5 | Use 10-6 inch tortillas and cut circles with a 4-inch cookie cutter to yield 15 circles |
| Unsalted butter, melted | 1 tablespoon | Brush to help shells brown; swap with coconut oil for dairy-free |
| White chocolate | 13 ounces | Chopped or chips; use high-quality couverture for best melt |
| Strawberry Crunch | As needed | See notes below for homemade strawberry crunch (freeze-dried strawberries + cereal) |
| Cream cheese, softened | 8 ounces | Room temperature for smooth mixing; low-fat will be less rich |
| Powdered sugar | 1/2 cup | Adjust for sweetness; sift to avoid lumps |
| Vanilla extract | 1 teaspoon | Pure vanilla gives best aroma; can use vanilla bean paste |
| Heavy whipping cream | 1 cup | Cold for easier whipping; use coconut cream for dairy-free variation |
| Strawberry syrup | 2/3 cup | Store-bought or homemade; use berry coulis if preferred |
| Fresh strawberries | 2 cups | Dice or halve for topping; use mixed berries for variety |
Image alt suggestion: Ingredients laid out on a countertop, labeled and ready for prep.
Step-by-Step Instructions
Follow these instructions to shape shells, melt chocolate, assemble the filling, and pipe the tacos. Each phase contains clear, action-first steps for a smooth workflow.
Phase 1: Make the tortilla shells
- Cut the tortillas with a 4-inch cookie cutter to create 15 circles.
- Brush each circle lightly with 1 tablespoon melted unsalted butter to encourage browning and crisping.
- Place the buttered circles on an inverted muffin tin so they form taco shell shapes.
- Bake at 350 F for 5-6 minutes or until the edges are golden.
- Remove the shells from the oven and let them cool for one minute in the muffin tin to keep their shape.
- Transfer the shells to a baking sheet lined with parchment paper and cool completely to set the shape and remove residual steam.
Phase 2: How to melt the white chocolate
- Set up a double boiler by pouring 1 inch of water into a deep pan and heating it until it simmers gently.
- Place a glass dish with chopped or crumbled 13 ounces of white chocolate over the pan, ensuring the dish does not touch the water.
- Lower the heat when the water begins to boil and stir the chocolate constantly with a spatula until it melts smoothly.
- Remove the dish from the heat and dry the bottom thoroughly so no water contacts the chocolate, which would seize it.
- Alternatively, melt the white chocolate in the microwave by heating for 20 seconds at a time, stirring between intervals, and stopping when the chocolate is just melted to avoid burning.
Phase 3: Coat shells with white chocolate and strawberry crunch
- Brush melted white chocolate over each shell, covering both the outside and inside to create a moisture barrier.
- Toss the coated shells in a bowl of strawberry crumbs to coat them well inside and out, pressing gently to adhere the crunch.
- Place the coated shells on a parchment-lined baking sheet and allow the chocolate to set completely at room temperature or in the refrigerator for 10-15 minutes.
Phase 4: Make the cheesecake filling
- Beat 8 ounces of softened cream cheese, 1/2 cup powdered sugar, and 1 teaspoon vanilla extract until smooth and free of lumps.
- Whip 1 cup heavy whipping cream in a separate chilled bowl until stiff peaks form.
- Fold the whipped cream into the sweetened cream cheese and beat briefly until smooth; avoid overmixing to maintain aeration.
- Transfer the filling to a piping bag and seal the tip until ready to fill shells.
Phase 5: Assemble the tacos
- Stand the hardened shells upright in an inverted muffin tin or a 9×13-inch dish so they remain stable while filling.
- Cut the tip of the piping bag and pipe the cheesecake filling into each shell until nearly full.
- Top each filled shell with diced fresh strawberries or strawberry halves and drizzle 2/3 cup strawberry syrup over the tacos.
- Chill the assembled tacos briefly if you prefer them very cool, then serve within a few hours for best texture.
Image alt suggestion: Step-by-step montage showing piping cheesecake filling into white chocolate taco shells.
Chef Tips for Perfect Results
Apply these professional tips to improve texture, speed, and presentation when making Strawberry Crunch Cheesecake Tacos.
- Warm the tortillas slightly in the microwave for 10-12 seconds before cutting and shaping so they bend without cracking; cool quickly after baking to retain crispness.
- Keep the white chocolate dry at all times; even a drop of steam will seize it. Wipe the bottom of your bowl after melting to prevent water contact when coating shells.
- Chill the piping bag and bowl for the whipped cream to whip faster and reach firm peaks; stop at stiff peaks to ensure the filling holds its shape in the tacos.
- Press the strawberry crunch gently into the chocolate while it is still tacky for maximum adhesion; if chocolate sets too quickly, warm it for a few seconds and reapply.
- Pipe slightly under the shell rim to avoid overflow when adding fruit and syrup; use a small offset spatula to neaten edges for a restaurant-style finish.
Image alt suggestion: Close-up of a piping bag filling a taco shell with cheesecake filling showing texture of the cream.
Common Mistakes to Avoid
Knowing common pitfalls prevents soggy shells and curdled chocolate when making these tacos. Each note below explains why the issue occurs and how to fix it.
- Not drying chocolate bowl: Chocolate seizes when water mixes with it. Always dry the bottom of the bowl after removing it from the double boiler and avoid steam contact.
- Overbaking shells: Overbaked tortillas become brittle and can crack when shaped. Bake just until edges are golden and test one shell for flexibility before removing the rest.
- Underwhipping cream: Soft peaks will produce a loose filling that will not hold shape. Whip to stiff peaks and use chilled equipment for best results.
- Applying crunch too late: If chocolate fully hardens before adding strawberry crunch, crumbs will not stick. Work quickly while chocolate is tacky or rewarm briefly to recoat.
- Filling too early: Filling warm shells can cause melting and sogginess. Ensure shells and chocolate are fully set and cool before piping the filling.
Image alt suggestion: Illustration of a broken shell with tips overlay explaining causes and fixes.
Variations and Substitutions
This table answers how to adapt ingredients for allergies, flavor swaps, and dietary needs while explaining the flavor and texture impact.
| Ingredient | Substitution | Flavor/Texture Impact |
|---|---|---|
| Flour tortillas | Gluten-free tortillas | May be slightly more fragile; prebend gently and monitor baking time |
| Unsalted butter | Coconut oil | Imparts a mild coconut note and still promotes browning |
| White chocolate | Milk chocolate or compound coating | Stronger chocolate flavor; darker color and firmer set |
| Heavy whipping cream | Coconut cream | Dairy-free with slightly denser mouthfeel and coconut aroma |
| Strawberry Crunch (store-bought) | Homemade: crushed freeze-dried strawberries + crisp rice cereal | Fresh, intense strawberry flavor with lighter crunch |
Image alt suggestion: Three variation tacos displayed with labels showing substitutions and resulting textures.
Serving Suggestions and Pairings for Strawberry Crunch Cheesecake Tacos
Serve these tacos chilled or at room temperature with complementary sides and drinks for a full dessert course. They pair especially well with simple, bright flavors that echo the strawberries.
Try serving the tacos with a scoop of vanilla bean ice cream, a small bowl of mixed berries, or a lemon shortbread cookie. Pair beverages like sparkling water with a lemon twist, non-alcoholic sparkling rosé, or a chilled berry iced tea to balance the richness.
These tacos fit celebrations like Mother’s Day, summer barbecues, bridal showers, and kid-friendly parties where handheld desserts are preferred. Garnish with fresh mint, micro basil, or a light dusting of powdered sugar for a polished presentation.
Image alt suggestion: Dessert table showing tacos on a platter surrounded by ice cream and a pitcher of berry iced tea.
Storage and Reheating
Use the following storage methods to keep assembled tacos fresh and the shells crisp for as long as possible. Reheating is not recommended for already-filled tacos; instead follow the instructions for storing shells separately.
| Method | Duration | Instructions |
|---|---|---|
| Unfilled shells, room temp | Up to 3 days | Store in an airtight container at room temperature to preserve crispness; avoid humidity. |
| Unfilled shells, refrigerated | Up to 5 days | Keep in airtight container; bring to room temperature before filling to reduce condensation. |
| Filled tacos, refrigerated | Up to 24 hours | Store in a single layer in an airtight container; consume within a day to avoid sogginess. |
| Frozen (filling and shells separate) | Up to 1 month | Freeze filling in a piping bag and shells wrapped tightly; thaw overnight in the fridge and assemble before serving. |
Image alt suggestion: Airtight containers showing unfilled shells and a separate bag of cheesecake filling ready for future assembly.
Nutritional Information
Below are approximate nutrition values per serving based on 15 tacos total. Values vary by exact brands and portion sizes.
| Nutrient | Amount per Serving |
|---|---|
| Calories | 210 |
| Protein | 3 g |
| Fat | 14 g |
| Carbohydrates | 20 g |
| Fiber | 1 g |
| Sugar | 12 g |
| Sodium | 120 mg |
Approximate values.
Image alt suggestion: Nutrition label-style graphic summarizing calories and macros per taco.
Frequently Asked Questions
Can I substitute freeze-dried strawberries for store-bought Strawberry Crunch?
Yes, you can substitute freeze-dried strawberries for store-bought Strawberry Crunch by pulsing them with crisp rice cereal to create a crunchy coating. This homemade approach intensifies strawberry flavor and keeps the texture light. Store the mixture in an airtight container until ready to use to prevent it from absorbing moisture.
How do I know when the white chocolate coating is properly set?
The white chocolate coating is properly set when it loses its glossy sheen and feels firm to the touch. This usually takes 10 to 15 minutes at room temperature or a few minutes in the refrigerator. Avoid touching the chocolate repeatedly because the warmth from hands will soften it and can leave fingerprints.
What should I do if my whipped cream deflates when folding into the cream cheese?
If the whipped cream deflates, stop folding and chill the mixture briefly to firm it up before gently re-whipping by hand to restore some volume. Deflation occurs from overmixing or warm ingredients; always fold with a light hand and ensure the cream cheese is not too warm. If the texture is too loose, add a tablespoon of sifted powdered sugar to help stabilize the filling.
Can I make these Strawberry Crunch Cheesecake Tacos ahead of time?
Yes, you can make the shells and the cheesecake filling ahead of time, storing them separately to maintain crispness. Keep unfilled shells in an airtight container at room temperature and refrigerate the filling in a sealed container for up to 24 hours. Assemble the tacos no more than a few hours before serving for best texture and presentation.
How should I store leftover assembled cheesecake tacos for later?
Store leftover assembled tacos in a single layer in an airtight container in the refrigerator and consume within 24 hours. The shell will gradually soften as it absorbs moisture from the filling, so eating them the same day preserves the crisp contrast best. For longer storage, keep shells and filling separate and assemble when ready to serve.
Image alt suggestion: FAQ summary panel with icons representing storage, prep, and troubleshooting tips.
Try these Strawberry Crunch Cheesecake Tacos for your next celebration to deliver crunch, cream, and fresh strawberry brightness in every bite. Prep the shells and filling ahead to streamline assembly, and garnish each taco with extra drizzle and berries for a show-stopping finish. The contrast of crisp white chocolate shells and silky cheesecake filling keeps each taco interesting and delicious.
Internal links: Easy Cheesecake Recipes, Summer Dessert Ideas, Party Handheld Desserts
External authority links: Food Network, Nutrition.gov
Image alt suggestion: Final plated tacos arranged with syrup drizzles and mint leaves, ready to serve.

Strawberry Crunch Cheesecake Tacos
Ingredients
- Large flour tortillas (10-6 inch)
- 1 tablespoon unsalted butter, melted
- 13 ounces white chocolate, chopped or chips
- 4 tablespoons freeze-dried strawberries, crushed
- 4 tablespoons crispy cereal (rice krispies or puffed rice)
- 8 ounces cream cheese, softened
- 1/2 cup powdered sugar
- 1 teaspoon pure vanilla extract
- 1/2 cup heavy whipping cream
Instructions
- Preheat oven to 350°F. Grease 15 muffin tin cups
- Brush both sides of tortillas with melted butter
- Shaping warm tortillas over inverted muffin tin cups to form taco shells
- Place filled shells on prepared muffin tin, bake 15 minutes
- Meanwhile melt white chocolate gently with a double boiler (avoid burning), stirring until smooth
- Brush melted white chocolate inside shells and let set (skip for assembled version)
- In bowl, mix cream cheese, powdered sugar, and vanilla until smooth
- Whip heavy cream to stiff peaks and fold into cream cheese mixture
- Pipage filling into shells, garnish with strawberry crunch topping and drizzle with strawberry syrup
Notes
Sift powdered sugar for lump-free filling
Add food coloring to white chocolate for visual appeal
Freeze leftover shells between parchment paper for easier storage
For faster assembly, melt white chocolate just before piping filling