
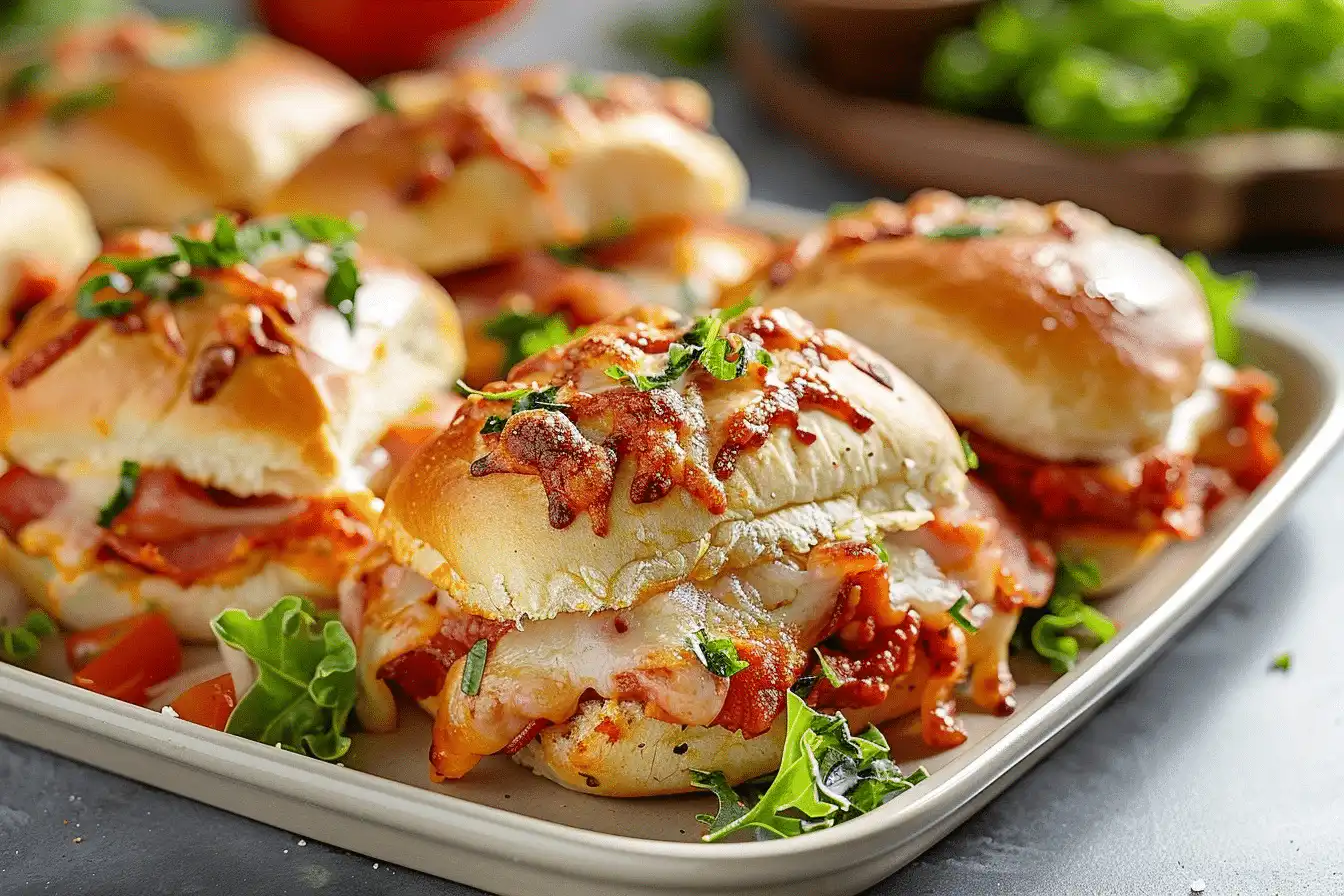
Pizza Sliders are miniature, layered sandwiches made with King’s Hawaiian sweet rolls topped with pizza sauce, pepperoni, and melted mozzarella and parmesan. These Pizza Sliders bake together in one pan for quick assembly, crowd-pleasing texture, and an irresistible buttery garlic top. The recipe uses simple pantry ingredients and delivers consistent, melty results every time.
| Prep Time | Cook Time | Total Time | Servings | Difficulty | Cuisine |
|---|---|---|---|---|---|
| 15 minutes | 15–20 minutes | 30–35 minutes | 24 sliders | Easy | American / Italian-inspired |
Image ALT: Close-up of a tray of melted, golden Pizza Sliders ready to serve.
Why This Recipe Works
This recipe works because the sweet, pillowy rolls pair perfectly with savory pizza flavors to create a balanced handheld bite. I rely on King’s Hawaiian rolls for their soft crumb and slightly sweet crust, which contrasts beautifully with tangy marinara, spicy pepperoni, and gooey cheeses.
I use a layered, one-pan method to maintain texture and make serving effortless. As an experienced home cook I find that spreading sauce on both the bottom layer and the cut sides of the tops keeps each slider saucy without making the rolls soggy.
Image ALT: A hand pulling apart a cheesy Pizza Slider to reveal gooey melted cheese.
Ingredients
| Ingredient | Quantity | Notes/Alternatives |
|---|---|---|
| King’s Hawaiian sweet rolls (12 count) | 2 packages | Use fresh rolls; do not pull apart before slicing |
| Pizza sauce or marinara | 13 ounces (about 1 1/2 cups) | Store-bought or homemade; reserve about half for tops |
| Sliced pepperoni | 8 ounces | Use turkey or beef pepperoni for pork-free option |
| Shredded mozzarella | 16 ounces | Use whole-milk for best melt |
| Freshly grated parmesan | 6–8 ounces | Grate from wedge for brighter flavor |
| Pizza seasoning | 1 1/2 teaspoons | Or use 1 teaspoon oregano + 1/2 teaspoon basil |
| Unsalted butter, melted | 2 tablespoons | Clarified butter tolerates longer broiling if used |
| Fresh garlic, finely minced | 1 clove | Or 1/4 teaspoon garlic powder |
| Italian seasoning | 1 teaspoon | Or use 1/2 tsp each oregano and basil |
| Salt & pepper | Pinch each | Adjust to taste |
| Optional toppings | As desired | Thin bell pepper, roasted red pepper, onion, cooked non-pork sausage |
Image ALT: Layout of measured ingredients for Pizza Sliders on a kitchen counter.
Step-by-Step Instructions
Follow each step exactly for consistent, melty Pizza Sliders every time.
Prepare the pan and rolls
- Preheat the oven to 350°F.
- Spray a large baking dish or rimmed baking sheet with cooking spray and set aside.
- Slice the two packages of King’s Hawaiian rolls in half horizontally using a large serrated knife, separating tops from bottoms as you would a bagel; do not pull the rolls apart by hand.
- Arrange the bottom halves in a single layer in the prepared baking pan, cut side up.
Assemble the sliders
- Mix the shredded mozzarella, grated parmesan, and pizza seasoning in a bowl until evenly combined.
- Evenly spread about half of the pizza sauce over the bottom layer of the rolls.
- Sprinkle half of the cheese mixture over the sauce, ensuring even coverage to each roll.
- Layer the pepperoni slices over the cheese, arranging them so each slider gets 1–2 slices.
- Top the pepperoni with the remaining cheese mixture, pressing lightly to nestle the cheese into the rolls.
- Spread the remaining pizza sauce on the cut sides of the roll tops and place the tops over the assembled bottoms.
Finish and bake
- Melt the butter in a small bowl and combine with the minced garlic, Italian seasoning, and a pinch of salt and pepper.
- Brush the butter mixture evenly over the tops of the sliders.
- Bake the sliders at 350°F for 15 to 20 minutes until the cheese is melty and the tops are slightly browned.
- Optionally grate additional parmesan over the sliders immediately after removing them from the oven, then slice into individual sliders and serve warm.
Image ALT: Step-by-step assembly of Pizza Sliders in a baking dish before baking.
Chef Tips for Perfect Results
Use these professional tips for consistent texture, even melt, and balanced flavor when making Pizza Sliders.
- Toast the bottom layer lightly for 3 minutes before assembling if you prefer a firmer base; this prevents sogginess with wetter sauces.
- Shred your own mozzarella from a block for better melt and less moisture than pre-shredded bags.
- Brush the tops with the butter mixture right before baking to get a glossy, golden finish; watch the oven closely in the last five minutes to avoid over-browning.
- Layer cheese both under and over the pepperoni to lock toppings in and create that iconic pull-apart effect.
- Allow sliders to rest for 2 minutes after baking to let the cheese set slightly for cleaner slices when serving.
Image ALT: Golden, brushed tops of baked Pizza Sliders with melted cheese visible between layers.
Common Mistakes to Avoid
Recognize and correct common issues before they ruin your Pizza Sliders.
- Using too much sauce causes soggy rolls; excess liquid pools and softens the crumb. Prevent this by spreading thin, even layers of sauce and toasting the bottom layer briefly if needed.
- Overfilling with toppings makes sliders hard to cut and serve. Use measured portions of pepperoni and cheese to maintain structure and consistent cooking.
- Skipping the butter brush leaves the tops pale and dry; the butter mixture promotes browning and adds flavor. Brush evenly and avoid pooling on one spot.
- Placing sliders too close together can prevent even browning on the tops. Use a pan that fits the sliders snugly but allows a little space for heat circulation.
Image ALT: Cross-section of a Pizza Slider showing proper cheese-to-roll ratio and moist-but-not-soggy crumb.
Variations and Substitutions
Swap ingredients confidently using these tested substitutions and understand their flavor impact.
| Ingredient | Substitution | Flavor/Texture Impact |
|---|---|---|
| Pepperoni | Turkey or beef pepperoni, or sliced roasted vegetables | Maintains spice; vegetables add earthiness and lower fat |
| Mozzarella | Provolone or a mozzarella-provolone blend | Provolone adds nuttier taste and slightly firmer melt |
| King’s Hawaiian rolls | Slider buns or dinner rolls | Less sweetness; slightly firmer texture |
| Parmesan | Pecorino Romano | Sharper, saltier finish |
| Sausage (optional) | Cooked chicken sausage or turkey sausage | Keeps recipe pork-free while adding savory richness |
Image ALT: Three plated variations of Pizza Sliders showing different toppings and cheeses.
Serving Suggestions and Pairings
Serve Pizza Sliders with complementary sides and beverages that amplify the pizza flavors and create a complete meal or party spread.
Pair sliders with crisp garden salad, garlic parmesan fries, or roasted vegetables for texture contrast. Offer a variety of dipping sauces like extra marinara, garlic butter, or a creamy ranch to accommodate different tastes.
For drinks, choose sparkling lemonade, iced tea, or non-alcoholic craft sodas to balance richness. These sliders work for game day, casual weeknight dinners, potlucks, and holiday appetizer platters. Find more side-dish ideas here: slider variations, or learn about Hawaiian roll uses at Hawaiian roll recipes.
Image ALT: Party spread with Pizza Sliders, salad, and dipping sauces ready for serving.
Storage and Reheating
Store and reheat Pizza Sliders to preserve texture and flavor for later enjoyment.
| Method | Duration | Instructions |
|---|---|---|
| Refrigerator | 3–4 days | Cool completely, wrap pan with plastic wrap or transfer to airtight container; reheat in oven at 325°F for 10 minutes. |
| Freezer | Up to 2 months | Wrap tightly in foil and place in freezer bag; thaw overnight in refrigerator before reheating in oven at 325°F for 15–20 minutes. |
| Microwave (single serving) | Immediate | Reheat on medium power for 30–60 seconds until warm; finish in toaster oven for crisp top. |
Image ALT: Leftover Pizza Sliders reheated and plated with fresh basil garnish.
Nutritional Information
Estimated nutrition per slider and approximate values to guide dietary decisions.
| Nutrient | Amount per Serving |
|---|---|
| Calories | 260 kcal |
| Protein | 12 g |
| Fat | 14 g |
| Carbohydrates | 22 g |
| Fiber | 1 g |
| Sugar | 6 g |
| Sodium | 560 mg |
Approximate values.
Image ALT: Nutrition facts graphic next to a sliced Pizza Slider on a plate.
Frequently Asked Questions
Can I make pizza sliders with turkey pepperoni substitutions?
Yes, you can use turkey or beef pepperoni as a substitute for traditional pepperoni to keep the recipe pork-free. Both alternatives preserve the spicy, cured flavor while aligning with dietary restrictions. Vegetables like roasted mushrooms or eggplant also make flavorful vegetarian substitutes when paired with extra seasoning.
How do I know when pizza sliders are done?
Pizza sliders are done when the cheese is fully melted and the tops are lightly browned. The internal temperature should reach 165°F for any added cooked sausage or poultry toppings. If the tops brown too quickly, lower the oven temperature by 10–20 degrees and extend baking time slightly.
What troubleshooting steps fix greasy or soggy pizza sliders?
Reduce sogginess by using less sauce and toasting the bottom layer briefly before assembly if needed. Choose lower-moisture cheeses or drain any vegetables you add to avoid excess liquid. For greasy sliders, blot excess fat from cooked sausage or use leaner protein alternatives to reduce runoff during baking.
Can I make-ahead pizza sliders for a party?
Yes, you can assemble sliders up to one day ahead and refrigerate before baking. Keep the butter brush and final topping separate until just before baking for maximum freshness. For larger make-ahead plans, freeze assembled sliders and bake from thawed as instructed for best texture.
How should I store pizza sliders for later serving and reheating?
Store cooled sliders in an airtight container in the refrigerator for three to four days. For longer storage, wrap them tightly and freeze for up to two months, then thaw overnight before reheating in the oven. Reheat gently at 325°F to preserve texture and prevent drying out.
Image ALT: Q&A style layout with small images of slices and reheated sliders accompanying each FAQ.
Conclusion: Pizza Sliders are an easy, crowd-friendly recipe that brings pizza flavors to a soft, sweet roll with minimal effort. Use the step-by-step method and chef tips to get consistent melty cheese, balanced sauce, and a golden garlic-butter top. Try these sliders for game day, family dinners, or casual parties and savor that perfect cheesy pull with every bite.
Image ALT: Final plated Pizza Sliders with a sprig of fresh basil and a side of marinara for dipping.
Internal links: Mini Pizzas, Hawaiian Roll Ideas, About the Author.
External resources: For food safety guidance see Healthline and for pizza technique inspiration visit Serious Eats.

Cheesy Hawaiian Roll Party Pizza Sliders
Ingredients
- 2 packages (24) King’s Hawaiian sweet rolls
- 13 oz pizza sauce (store-bought or homemade)
- 8 oz turkey or beef pepperoni slices
- 16 oz shredded whole-milk mozzarella
- 6–8 oz freshly grated parmesan
- 1½ tsp pizza seasoning (or 1 tsp oregano + ½ tsp basil)
- 2 tbsp melted unsalted butter
- 1 clove fresh garlic (or ¼ tsp garlic powder)
- 1 tsp Italian seasoning
- Pinch salt and black pepper
Instructions
- Line a 9x13-inch baking pan with parchment paper
- Arrange 12 rolls in the pan, cutting 4 diagonally to create 16 as needed
- Spoon 1½ tbsp pizza sauce evenly over each roll (reserve ¼ cup for tops)
- Sprinkle pepperoni slices evenly
- Layer mozzarella and parmesan (about 2 tbsp total per roll)
- Drizzle remaining sauce over tops
- Divide butter, garlic, and Italian seasoning in a small bowl, mix to combine
- Brush butter mixture over tops of rolls with a small spoon
- Place remaining 12 rolls on top of filled ones, cutting 4 as needed
- Bake at 375°F (190°C) for 10–12 minutes
- Broil 1–2 minutes for golden tops if desired
- Let rest 5 minutes before serving
Notes
Reserve extra sauce in a small bowl during assembly
For pork-free pepperoni: use turkey or beef
Pan can be repositioned during baking for even browning
Leftovers keep 2 days in airtight container